ASTRA WiFi Configuration
First Power On
After powering on, the ASTRA controller automatically creates a WiFi access point for initial setup. The configuration process takes 2-3 minutes.
Configuration Methods
Method 1: Web Interface (Recommended)
Step 1. Connect to ASTRA Access Point
- Power on the ASTRA controller
- On your smartphone/tablet/laptop, open WiFi settings
- Find network named
ASTRA_XXXXXX-#### -
XXXXXX— unique device identifier -
####— last 4 digits of MAC address - Example:
ASTRA_3D5E26-7718 - Connect to this network (no password required)
Step 2. Open Configuration Page
After connecting to ASTRA WiFi:
- Open web browser on your device
- Navigate to:
http://192.168.4.1 - WiFi configuration page will open
Step 3. Configure Your Network Connection
On configuration page:
- Select your WiFi network from discovered list
- Or enter network name (SSID) manually
- SSID is case sensitive!
- Enter password for your WiFi network
- Maximum 64 characters
- No special characters (* @ # etc.)
- No spaces
- Check "Show password" box to verify
- Click "Save" button

Step 4. Complete Setup
After saving settings:
- Controller will restart and connect to your network
- New IP address will be displayed
- Write down this address — you'll need it for control
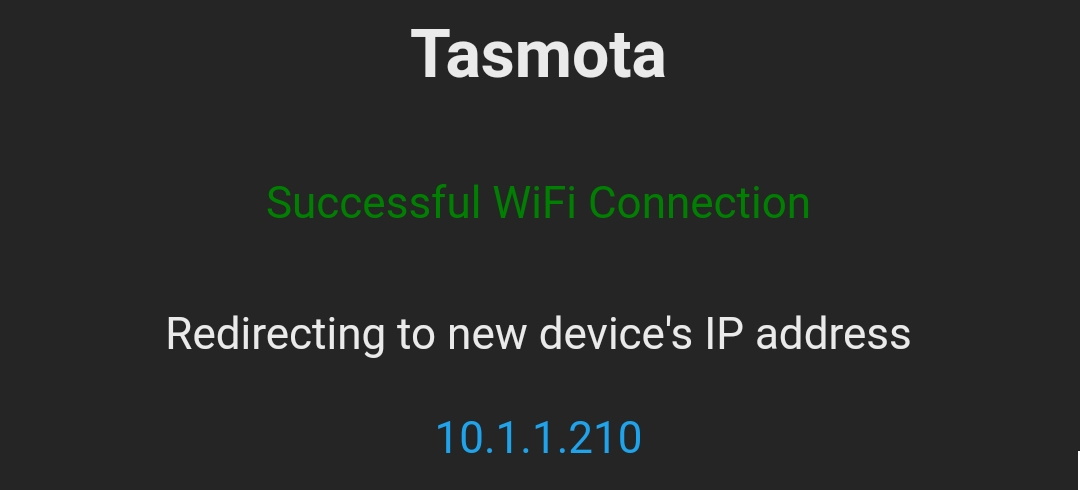
Successful connection example:
- Use network scanning app:
- Android/iOS: Fing
- Windows: Advanced IP Scanner
- Linux/Mac: nmap or arp-scan
Method 2: Serial Terminal (Advanced Users)
Requirements
- USB-UART adapter (CH340, FTDI, CP2102)
- Terminal program:
- Windows: Termite, PuTTY
- Linux/Mac: minicom, screen
- All platforms: Arduino IDE Serial Monitor
Terminal Setup
- Connection parameters:
- Baud rate:
115200 - Data bits:
8 - Stop bits:
1 - Parity:
None -
Flow control:
None - Enable options:
- Local Echo (see typed text)
- Append CR+LF (add line ending)
Configuration Commands
Basic WiFi setup:
Backlog ssid1 YourNetwork; password1 YourPassword
Full setup with backup network:
Backlog ssid1 MainNetwork; password1 Pass1; ssid2 BackupNetwork; password2 Pass2
MQTT setup (for integration):
Backlog mqtthost 192.168.1.100; mqttuser user; mqttpassword pass; topic astra_01
Connection Verification
- Open web browser
- Enter controller IP address
- ASTRA main page should open
Controller indicators:
- WiFi LED slow blink — searching for network
- WiFi LED solid — connected
- WiFi LED fast blink — connection error
Troubleshooting
Cannot See ASTRA Access Point
- Ensure less than 3 minutes passed since power on
- Press RESET button to restart
- Check controller power supply
Cannot Connect to WiFi Network
- Verify password is correct
- Ensure network is 2.4 GHz (5 GHz not supported)
- Check password has no special characters
- Try restarting your router
To reset WiFi configuration:
1. Press and hold RESET button
2. Power on controller
3. Keep holding RESET for 10 more seconds
4. Release button — settings are reset
Quick Reference Card
| LED Status | Meaning |
|---|---|
| Slow blink | Searching for WiFi |
| Solid ON | Connected |
| Fast blink | Connection error |
| OFF | WiFi disabled |
| Button | Action |
|---|---|
| RESET (short press) | Restart controller |
| RESET (10 sec hold) | Factory reset WiFi |